Hi everyone, hopefully your finally enjoying the weekend wherever you are in the world and having a lovely time. Its absolutely freezing here in New Zealand and the rain just won't go away, so I'm very happy to be sitting inside making cards.
I wanted to let you know I'm on the CAS-ual Fridays Stamps Blog today with a blog tutorial for this card:
I made an absolute mess and got Distress Oxide ink EVERYWHERE but love how it turned out. You'll find instructions and photos on the blog.
Enjoy your weekend and I'll see you back here again very soon.
Take care
Shona
Yippee!!! Its New Release Day at Funky Fossil Designs!! The five stamp sets we've been showing off this week are finally available for purchase.
Here are the new sets again:
Such fantastic designs and there really is something for everyone. And its a very good idea to visit the Funky Fossil Designs Blog too because there may just be a give away........
I wanted to share another card with you today using one of my favourite sets from the release. It was the one I was most worried about colouring but the images are naturally easy to navigate with depth and shading. This time I tried watercolouring and I'm in love with the outcome:
I found it easier to get a more natural, softer look for her blush, as well as the shading for her nose, eyes and neck. Will definitely be using this set alot!
I stamped the image from the 'She is Fierce' set with Gina K Amalgam Black ink on some watercolour CS. I then used Zig Real Colour Brush Markers, along with a brush and water to slowly bring her to life. Once I was happy I fussy cut her out and went around the edges with a black pen.
For the background I wanted something with wings (to link with the sentiment) and also nothing too bright to take away from her. I blended some Distress Inks 'Mermaid Lagoon' and 'Salty Ocean' making them lighter towards the bottom of the card front. I then used Verafine Onyx ink to stamp the flowers and butterflies from the 'In the Meadow' set. To finish off I stamped the sentiment on a strip of which CS and put on foam tape, along with Neat and Tangled sequins.
This will be my fifth and final entry for the current Simon Says Stamp - Wednesday Challenge where their theme is 'Anything Goes'.
Thank you so much for joining me this week with the release previews. I really hope you love all the new sets as much as I do and if you do go shopping, I would love to see what you create. You can always tag me on Instagram at shona.chambers. I'll see you back here again soon with some more ideas from this new release.
Take care
Shona
Hi everyone!! Hopefully when your reading this post I'm staying with my Mum for the weekend (I say hopefully because you never know when my brother will turn up....long story.....). I haven't stayed since before lockdown in February so will be fabulous to spend time watching some movies, do lots of talking and make some cards.
We are showing off the last of the New Release stamp sets for Funky Fossil Designs. Your going to love this one, introducing 'She is Fierce' designed by Donna Gray:
Isn't it fantastic?!!! Its another A5 set so all the images are the perfect size for a card. I really like the sketchy designs and even though I was really scared about colouring them (I don't colour human images very often) they have become my favourite. This card is my first attempt at playing 'make-up artist':
Think I need to watch a few more make-up YouTube videos by Jeffrey Star and Tati Westbrook to get the look right but really happy with my first try.
I stamped the image on white CS using Gina K Amalgam Black ink and coloured with my Altenew Artist Markers. Also did the same with the small floral image. I fussy cut them out and glued the flower in her hair.
For a pretty background I used my Waffle Flower inks and the 'In the Meadow' stamp set. The flowers have quite long stems so I kept the ink mostly on the flower itself. I also kept putting the image in the middle to make sure it was balanced. Once I had finished I cut the panel down slightly and glued to a black CS panel for a frame effect. This was then put on the card front with a piece of black foam.
I put the girl on some foam tape and then did the same with the heat embossed sentiment (which is from the new 'Small Print' set), and finished off with some Studio Katia pearls.
I'm going to link this to the Simon Says Stamp - Wednesday Challenge where their theme is 'Anything Goes'. This is my fourth entry, they will be getting sick of me.....
Right, that's it for all the stamp set previews. Tomorrow is 'Release Day' and all the sets will be available for purchase. I'll see you then with some more ideas using these amazing sets. And if you want to see more, pop over to the Funky Fossil Designs Blog to see what the rest of the Design Team created.
Take care
Shona
Hi everyone!! Its so cold and dreary, sitting here typing away in my freezing craft corner, my fingers about to succumb to frost-bite....the joys of living in an old house...
I'm back today with Day 3 of previews for the Funky Fossil Designs June New Release. We've shown you 3 stamp sets so far and have another one today. Introducing 'Starfish Wishes' designed by Anastasia Venediktova:
I've seen so many starfish stamps and images lately, so this is definitely on trend. And they are so much fun to colour too with all the patterns. I really wanted to capture the feeling of water with my card and was in the mood for lots of fussy cutting:
Blue and white is such a good colour combo. It reminds me of china patterns and the white really pops against it.
I started off by blending some Distress Inks - 'Salty Ocean', 'Mermaid Lagoon', 'Peacock Feathers' and Chipped Sapphire' - over a panel of white CS. I then used Ranger White Embossing Powder to heat emboss the shell images. I think I might need another Versamark Pad because even after re-inking it still didn't get the powder to hold very well (its gets used ALOT!!). I stamped the shells on the panel the way I wanted them on the card, so took a photo before I fussy cut them all out.
Using Gina K Connect Glue I adhered all the shells on a piece of white CS as per the photo. I then put it on the card front with a piece of white foam. The sentiment (from the 'In the Meadow' stamp set) was white heat embossed on a strip of navy CS. I put it on foam tape, along with sequins from Neat and Tangled.
I'll link this to the Simon Says Stamp - Wednesday Challenge where their theme is 'Anything Goes'. This is my third entry.
I hope this card gives you an idea on how to use this stamp set and I'm sure you could think up millions of ideas on your own too. I'll be back again tomorrow with the last preview stamp set.
Thanks so much
Shona
Hello there!! This week started out beautiful and sunny but took a dramatic Wintery turn on Wednesday. Its supposed to rain from today onwards for about five days, so even if I can't garden I can always craft!!
We have this gorgeous photo as inspiration for the current TIME OUT Challenge. You could be inspired by the rainbow colours, the frills or maybe even the pinata?? Its totally up to you!
Our Sponsor for this challenge is Funky Fossil Designs who are giving a voucher to the winner. And they have a New Release coming out this Saturday, so the voucher will definitely come in handy!!
I'm very lucky to be part of the Design Team for Funky Fossil Designs so for my card I used two of the new stamp sets we previewed this week, that are part of the New Release:
Isn't it funny...I've looked at this card a hundred times and it wasn't until I looked at the enlarged photo that I realised not only did the pattern get on a bit of an angle but it could have used another stamp along the right edge.....how did I not see this???!! Oh well, think I was mesmerised by the yummy rainbow colours.....
Using the smallest arch stamp from the new 'Find your Rainbow' set, I tried to emulate the rainbow frill of icing going around the cake. I used inks from Waffle Flower and a gorgeous purple from Catherine Pooler 'Grape Crush'. I stamped across the panel with each colour and then put it on some white foam on the card front.
The sentiments (from the new 'Small Print' set) were white heat embossed on black CS and popped up on foam tape, along with some jewels from Pretty Pink Posh.
Will link this to the Simon Says Stamp - Wednesday Challenge where their theme is 'Anything Goes'. This is my second entry.
You have until Wednesday 1st July to link your projects to the TIME OUT Challenge and if your needing any help with ideas, pop over to the blog to see what the rest of the Design Team and our amazing Guest Designer Sathya of Paperie Expressions have created for you. Can't wait to see your projects in the Gallery!!
Take care
Shona
Hi everyone and welcome to Day 2 of previews for the Funky Fossil Design New Release!! All of the stamp sets will be available this Saturday and if you go to the Funky Fossil Designs Blog you can see more card designs from the rest of the Design Team.
Yesterday we shared with you two new stamp sets 'Find your Rainbow' and 'Small Print'. Today we are showing you 'Geo Bugs':
This is an A5 stamp set and the bugs all a big size, so they are perfect to be a star on a card. They are also lots of fun to colour too. And the hexagons....I love them all so much!
For my card I wanted to play with a bug and the hexagons to make my own background:
This was so much fun to do and I loved doing a rainbow pattern on the butterfly. The hexagons are also really easy to line up too.
To start with I stamped the butterfly with Gina K Amalgam Black ink on white CS and coloured with Altenew Artist Markers, adding some subtle shade and depth. I fussy cut it out and added foam tape to the back.
On a panel of white CS I stamped the larger hexagon with Versafine Onyx ink, starting with the middle one and working out from there. I then did the smaller hexagon, and then the smaller one again inside each one. I adhered a panel of black CS to the card front (card size is 4 1/4 x 4 1/4 inches) and then the hexagon panel on top. The butterfly was popped in the middle and the heat embossed sentiment was also put on foam tape. I finished off with some Studio Katia pearls and added Wink of Stella to the blue parts of the butterfly.
Will link this to the Simon Says Stamp - Wednesday Challenge where their theme is 'Anything Goes'.
What are your thoughts?? Do bugs creep you out or could you overlook that to have fun with these?? Its such a unique set and I can't wait to show you more ideas. I'll see you back here tomorrow with another new stamp set!
Take care
Shona
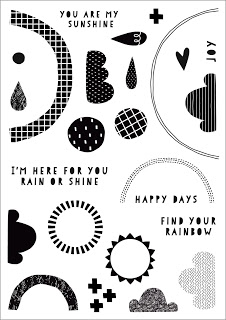
Hello again!! So excited to be showing off the New Release stamps from Funky Fossil Designs. There are so many fantastic designs and lots to choose from.
Today we are previewing two stamp sets. I've already shown off the first set 'Find your Rainbow' in my blog post HERE. Now I'm showing you the second set 'Small Print':
This set is going to be used ALOT I can see it now, as there are so many sentiments I don't have already and they are such a good size. I decided to get adventurous with my card and create a scene. I even did some masking:
As I've mentioned I didn't receive my stamps in time for the April release, so couldn't wait to ink them up when they arrived!!
I started by stamping the bee's and toadstools (from'Bee's Knees') with Gina K Amalgam Black ink on white CS, colouring with Altenew Artist Markers and fussy cutting out. I wanted to use the 'Find your Rainbow' set for the sky, so I stamped the sun and clouds (with Waffle Flower and SSS inks) on some Inkadinkado Masking Paper as well as the card front. I cut out the masks, put them on and blended some Distress Inks 'Salty Ocean' and 'Mermaid Lagoon'. I was a bit too rough as the masking papers folded a bit and I got some blue on the clouds and sun but its not too bad. I then did some dots in the sun with some yellow Altenew markers.
I blended Distress Ink 'Mowed Lawn' on the bottom half of the card front, creating a little hill. I glued some of the toadstools directly to the card and put the three red ones on foam tape. I also used foam tape for the bee in the sky. I stamped the sentiment from 'Small Print' and then realised it looked a bit blah.
This is where I got very much out of my comfort-zone..... I used a brown 0.3 Copic Multi-liner to create a pebble path from the doorway. And I then used some Altenew Artist Markers to create some little tufts of grass. I'm over the moon with the final result!
Well that's the first two stamp sets...what do you think?? I'll be back again later tonight with another stamp set that's perfect for all you 'geometric loving' crafters out there!
Take care
Shona
Hi everybody!! I'm very excited this week because we have a New Release of stamps coming out from Funky Fossil Designs and this time I can actually take part in the previews!! My parcel containing the last release (in April) has only just arrived but luckily Sarah sent them out again along with the new stamp sets and they arrived a few days earlier, so I'm extremely happy. And your going to love them too!!
For our first preview day we actually have two stamp sets to share with you. For this blog post I'm introducing a set designed by Olga Angelloz Find Your Rainbow :
Isn't this fantastic?!! I'm obsessed with rainbows so this set has me giddy with happiness. Its a larger 6x8 inch set with so many images it will take me forever to use them all with the ideas I have.
For my card I actually didn't make a rainbow. I was immediately drawn to the raindrop with the swirls in it and it screamed at me to make a flower:
I wanted to show a flower that was being battered by the elements and was losing its petals. I thought it would go really well with the sentiment.
I started off by stamping the middle of the flower and then carefully stamped each petal using Waffle Flower and 'Soft Lilac' from Hero Arts inks. I trimmed the panel down and then backed it with some black CS to have thin lines on each side. This was popped up on black foam on the card front. I heat embossed the sentiment and put it on foam tape, along with Neat and Tangled sequins. I also added some Wink of Stella to the middle of the flower for some sparkle.
I love finding different ways to use stamps, gives you more bang for your buck!! I hope you like this card and I'll be back shortly to show off the second stamp set. Its one that will be very handy indeed. And all of the new stamp sets are available this Saturday!!
Take care
Shona
Hi everybody!! I managed to get all my gardening today before it rained, although its been cold and dark all day.....Winter is definitely here. The rest of the week looks like rain, rain and more rain, so might have time to kick my mojo in the butt and crank out some cards....
Our theme for this month at The Flower Challenge is 'Navy plus one other colour'. Navy is so stylish and gorgeous with so many colour combo's. The possibilities are endless!!
My mojo has taken a beating lately, so decided to set myself up in front of Netflix (I've been watching 'Parasyte' which is a Japanese Anime series. So not for my age range and have never watched anime before but for some reason I'm really enjoying it) with my pencils and gently coloured away the evening:
Yes, your eye's aren't deceiving you...that is patterned paper on my card. Its something I hardly EVER use but I just needed something in the background and I was stumped with ideas.
To start off I stamped this floral image from Gina K Designs 'You Make Me Smile' with Gina K Amalgam Black ink on white CS and coloured with my Faber Castell pencils. I knew I wanted Navy leaves but took me a while to choose the flower colours. Since the leaves were so dark I tried to colour the flowers softly but with subtle shading.
This is where I realised I had smudged the blue pencils over the background (between the leaves etc). I grabbed the same blue pencil and gently scribbled it in all the gaps with it going in the same direction. I fussy cut it out and decided to come back to it again.
For the frame I die-cut the Pretty Pink Posh 'Scallop Frame' from navy CS and twice more from black CS. I glued them all together and then to the card front. I realised I needed something behind the flowers and found this paper from a Rosies Studio paper pad 'Splendid'. I die-cut it with the same frame die and inset the middle part in the navy frame.
Back to the flowers, the scribbles looked terrible, so because I use watercolour pencils I used a teeny, tiny amount of water on a brush and blended out all the blue. I had to be careful because it was normal CS. I used some foam tape behind it on the card. The sentiment (from the same stamp set) was white heat embossed on the same navy card and put on foam tape, along with some Neat and Tangled sequins.
You have until Thursday 25th June to link your projects to The Flower Challenge and if your struggling with ideas, don't forget to pop over to the blog to see what the rest of the Design Team and our talented Guest Designer Jenny of Jenny Hall Design have made to inspire you. Hope I see you in the Gallery!
Take care
Shona
Hi everyone!! Boy oh boy did that weekend fly on by, so many things to do like housework etc and didn't even get a chance to sit down and relax like I had intended. My garden is screaming at me to sort it out for Winter but it will have to wait in line like everything and everyone else. I'm exhausted, emotionally and physically after the past week's antics with our dog. It got me thinking about life without her and I couldn't even imagine it. This of course had me thinking about everyone else in the world who loses a pet and how heart wrenching it is. This brought about today's CAS-ual Fridays Stamps card:

I am absolutely terrible at making sympathy cards (I get so upset while doing it), so you can imagine how hard I found it to make a sympathy card for someone who has lost their 'fur-baby'. This was my 4th attempt and I couldn't bear to put a picture of a dog on it (at the moment...) and thought this black/white cat would look so sweet against a colourful background. So sorry if you actually have a black and white cat.....
I used the brand new Pawesome Stencil, using washi tape to hold it over some white CS. I blended over Distress Oxide Inks - Spiced Marmalade, Mermaid Lagoon, Squeezed Lemonade, Twisted Citron and Picked Raspberry - to get a rainbow effect. I wiped off the stencil, put it back over the image and then spread over some Nuvo Glimmer Paste 'Moonstone'. I took the stencil off and immediately washed it (never leave it on, even for a few minutes......) and used my heat gun to dry it.
Once it was completely dry I fussy cut it out and added it to a 4.5 x 4.5 inch square white card base on foam tape. I stamped the cat from the Little Huggables stamp set with Gina K Amalgam black ink on white CS and used a black and pink Altenew Artist Marker to add some details. I fussy cut him out with the Little Critters Fri-dies and put him on the heart with foam tape.
The sentiment (from the Rainbow Bridge stamp set) was white heat embossed on black CS and put on foam tape. I tried adding some sequins but nothing worked. I find when that happens its telling you they are not needed, so I listen to the card.
I hope this gives you some ideas on how to create cards for your loved ones who have lost their own pets. If your thinking of purchasing any of the products I used today, don't forget to use my special code and that's ON TOP of any sale discounts too which have already been applied!!
Thank you so much for stopping by, I really appreciate your visits and your comments always make me smile. Have an amazing week and I'll see you back here again soon with some more CFS designs!
Take care
Shona
Hi everyone!! Hope your week has treated you well and your weather has been good to you. We've had a very emotional few days. Our Golden Retriever Bella has had this horrible fleshy lump on her chest since the middle of March. We emailed pictures to the vet during lockdown and he organised antibiotics and steriods to stop her itching. A few weeks later it was still there and we took her into see him. He said it looks worse than what it is and will eventually scab over and heal. More antibiotics and steriods. Weeks later I emailed more photos and spoke to him over the phone and he said it will take some time but it will be fine and more meds. I suggested surgery to remove but he said it wasn't necessary.
So since it was now three months since the first vet visit, we decided to get a second opinion. Dave took her to another vet on Monday and he immediately sedated her and took a biopsy. He called on Tuesday afternoon to say it was cancer. Yesterday we dropped her off and had to wait for a call after they did x-rays to see if the cancer had spread. At 10am they called to say it hadn't (YAY!!!) and she had a huge operation to remove the lump and a huge amount of tissue around it. I've stayed home with her today to keep an eye on her and give her lots of cuddles. Talk about yo-yo emotions but a good result. It may still come back but will deal with later if it happens.....
With all this going on I'm glad to have something happy to look forward too, like this reminder post about our current TIME OUT challenge!!
This is such a beautiful quote and being a gardener it totally pulls at my heartstrings. You can create any sort of project with how your inspired by this quote. You might choose one word, one line or maybe just how it makes you feel. Its totally up to you!
Our Sponsor for this challenge is the always generous Stamplorations who is giving a $25 gift voucher to the winner. So lucky!!
Shery from Stamplorations is always so good to us at TIME OUT and gave us stamp sets to use for their sponsored challenges this year. For this one I chose one that matched perfectly with the 'garden' theme:
The images in this stamp set are really good for colouring, they have lots of different nooks and crannies and every one has something different about it.
I cut a panel of white CS and stamped leaves from the Stamplorations 'Leaves of Thanks' set around the edges using Catherine Pooler 'Grass Skirt' ink. I then set myself up with Netflix and my Faber Castell pencils and coloured away. Unfortunately I didn't have the same colour green pencil to match the ink, so used turquoise colours along with blue so they were around the same tone.
Once I had finished colouring I cut the panel down slightly and put on the card front with a piece of white foam.
For the sentiment I found an oval die (from Studio Katia) that fit the stamp, so die-cut it from white CS and stamped it using the same green ink. I wanted it to have a slight green frame to it and since I didn't have a larger oval die, I adhered the white die-cut to some green CS and slowly fussy cut around it. Its not perfect but from far away its not too bad. I added it to the card with some foam tape and finished off with some Neat and Tangled sequins and used Wink of Stella on the words.
You have until Wednesday 17th June to link your projects to the TIME OUT challenge and if your finding it difficult to come up with a design, pop over to the blog to see what the rest of the Design Team and our fabulous Guest Designer Trina of Phamtastic Design have created to inspire you. Can't wait to see your projects in the Gallery!
Take care
Shona
Hi everyone!! Apart from everything being soaking wet and muddy, you would have no idea that a few hours ago it was dark, cold and trying to still rain. The sun is shining and has a lot of heat to it, which will dry everything out for the weekend. I've been home again today, fluffing around with housework etc and working out which card I need to make next...
A few weeks ago I shared with you a card I created with the Uniquely Creative 'Caravan' Die which comes as part of the 'Tropical Dreams' scrapbooking kit. The die was given to me to have a play around with and thought with all this sunshine, I would share the second card with you:
This is the cutest die and has so many details to it, including the door that opens. It can be used on so many projects and immediately invokes the 'holiday' feeling.
I started by die-cutting the caravan from white CS and colouring different parts like the wheel, window etc with Altenew Artist Markers. I popped some yellow polka-dot paper behind the window for curtains. I wanted this card to be more girly and not necessarily a 'realistic' scene. For the blue hill I drew around the side of a plate with a pencil on blue CS, cut it out and adhered to the card front.
I definitely wanted a sky so gently blended Distress Ink 'Salty Ocean from the top down about 2/3's, letting it fade out. The stars (from the 'Stitched 6 Window Frame die' set) was die-cut from yellow CS and glued in place with lots of 'Clear Sparkle Brush' added on top. The solid part of the 'Swirly Cloud Dies' were die-cut from white CS, the outline from soft lavender CS. They were glued together and then over the stars.
The rainbow (from 'Little Scribbles' die set) was die-cut twice from white CS. I glued the outlines together, then coloured the clouds and rainbow stripes with Altenew markers and inlaid back in. This was put on foam tape, along with the caravan. The sentiment (which unfortunately I just realised is no longer available) was white heat embossed on the same blue CS as the hill and put on foam tape. And to finish off I added some 'Sunshine' and 'Lavender' pearls for some shine.
I hope you enjoy this 'pastel-dreamland' of a card and it gives you some ideas on how to use your dies for different themes.
The kids will be home from school shortly, they are so looking forward to the weekend. Its been really stressful for them after being in lockdown for so long and being told they had to do schoolwork and attend every Zoom call etc, only to be told when they returned that it was fine if they didn't do anything at all.
The Government has also announced that they are awarding extra points for NCEA (which is the Nationwide acheivement system to pass subjects and gain access to University etc) which will take a lot of pressure off all the older students. Its amazing how much COVID-19 affected every single aspect on our life. The good news is we haven't had any new cases for two weeks, which is awesome and will be possibly going to Level 1 next week. That means we will basically be back to normal but still have lockdown on the border for non-NZers trying to come in. Fingers crossed!!
Take care
Shona
Hi there!! Really hope your all ok and you've all had a drier week than I have. I've only been able to garden once this week and I have washing hanging all over the house...gotta love Winter weather!!
A new month means a new challenge theme at The Flower Challenge and this month is all about using Navy plus one other colour. I love using navy with designs, its not as stark as black and so many colours go with it, which made it hard to choose just one....
For my card I wanted to have one central flower and have it large enough to watercolour, as I wanted to have a go at watercolouring with dark pink and navy:
I really enjoyed colouring this flower, was really interesting using two quite dark colours and watching them blend together with water.
I started by gold heat embossing the Ellen Hutson 'Mondo Magnolia' on some watercolour CS. The watercolours I used are from Altenew 'Tropical Fiesta Set' and it has the most incredible 'Desert Night' colour. Using a brush and water I added the blue to the petals from the base and bringing it about 3/4 up. I then used the 'Purple Wine' colour, starting from the end of the petal and heading towards the blue, adding water as I went. I did this about 3x, drying the flower in between. Once I was happy I fussy cut it out.
For the background I added a panel of navy CS to the card front. I then cut a slightly slimmer panel of white CS and stamped the same magnolia in two opposite corners with Hero Arts Shadow Ink Mid Tone 'Navy' which is my favourite navy ink. I glued the panel down and put the magnolia on foam tape. The sentiment (from the same stamp set) was stamped twice in the navy ink and then clear heat embossed twice with Simon Says Stamp embossing powder. I fussy cut it out and put on foam tape, along with Neat and Tangled sequins.
I'm going to link this to the Simon Says Stamp - Monday Challenge where their theme is 'Make your own Background'.
You have until Thursday 25th June to link your projects to The Flower Challenge and if your needing some ideas, pop over to the blog to see what the rest of the Design Team and our amazing Guest Designer Jenny Hall of Jenny Hall Design have made to inspire you. Can't wait to see all that navy in our Gallery!
Take care
Shona
Hi everyone, it is absolutely pouring down while I type this. Its 4.30pm Thursday afternoon, extremely dark, wet and cold. Thank goodness for our log fire and my thick socks. Unfortunately my little craft corner is so cold, I feel the chill in my feet. We had insulation put under the whole house but it hasn't made any difference in my part. Think I might have to invest in a little heater to put under my desk instead of dragging my craft stuff over in front of the fire!!
I mentioned recently that I had been catching up on Jennifer McGuire's YouTube videos. She is one clever woman, coming up with new techniques all the time, making me wonder 'why didn't I think of that???'. One of her recent ones was about Die-Cut Masking Techniques. She showed how you can die-cut from masking paper and create all sorts of designs. I had a look through my dies and thought I would give it a go:
Masking and I have a bit of a 'love/hate' relationship, especially masking and stamping to create a scene. I usually get the aspect wrong and smudge other images. This one I thought would be a bit easier.....
I die-cut The Stamp Market 'Circle Card Cover Die' from Inkadinkado Masking Paper and pressed it down on a big piece of white CS. I was just going to blend one colour over the whole thing but I realised I could use all the extra pieces to mask and use different colours. So using a mix of Distress Oxide inks, masking and the odd bit of scrap paper I was able to colour each area separately. Its not perfect and took a long time but removing the mask at the end was magical!!!
I found this perfect sentiment (from The Stamp Market 'Just Wonderful') that I tried heat embossing with different metallic powders but I couldn't get a solid look. So I stamped it twice with Versafine Onyx ink and immediately clear heat emboss with Simon Says Stamp embossing powder.
After fussy cutting the sentiment I realised I could have die-cut it with a similar size circle die (will do that next time...). I used a slightly bigger circle die (from Couture Creations) to die-cut the panel. I adhered the panel to the card front and then put the die-cut piece back on white foam. I then did the same with the sentiment, along with Neat and Tangled sequins.
I'm linking this to the Simon Says Stamp - Monday Challenge where their theme is 'Create your own Background'.
I'm freezing cold so will gather up my colouring supplies and do that while sitting in front of the fire. I have no idea what to make for dinner. Our kitchen is only partly renovated so freezing cold as well, so don't really want to stand out there for long.....might be a Pizza Hut delivery type of evening.....
Take care
Shona